
Setting Up A WordPress Server
Getting started with hosting your own website has really never been easier. However, while getting started is just a few commands away, getting something like WordPress up and running at full functionality can seem like a daunting task. When I set up my web server, I came across so many little hiccups and it felt like there was always something else to consider. Security was my main concern, but so was speed and SEO optimization. After all that I could finally focus on making content. This post will be my attempt at a comprehensive how-to combining all the things I’ve learned along the way on setting up my very own WordPress site from scratch.
Getting Your Own Domain
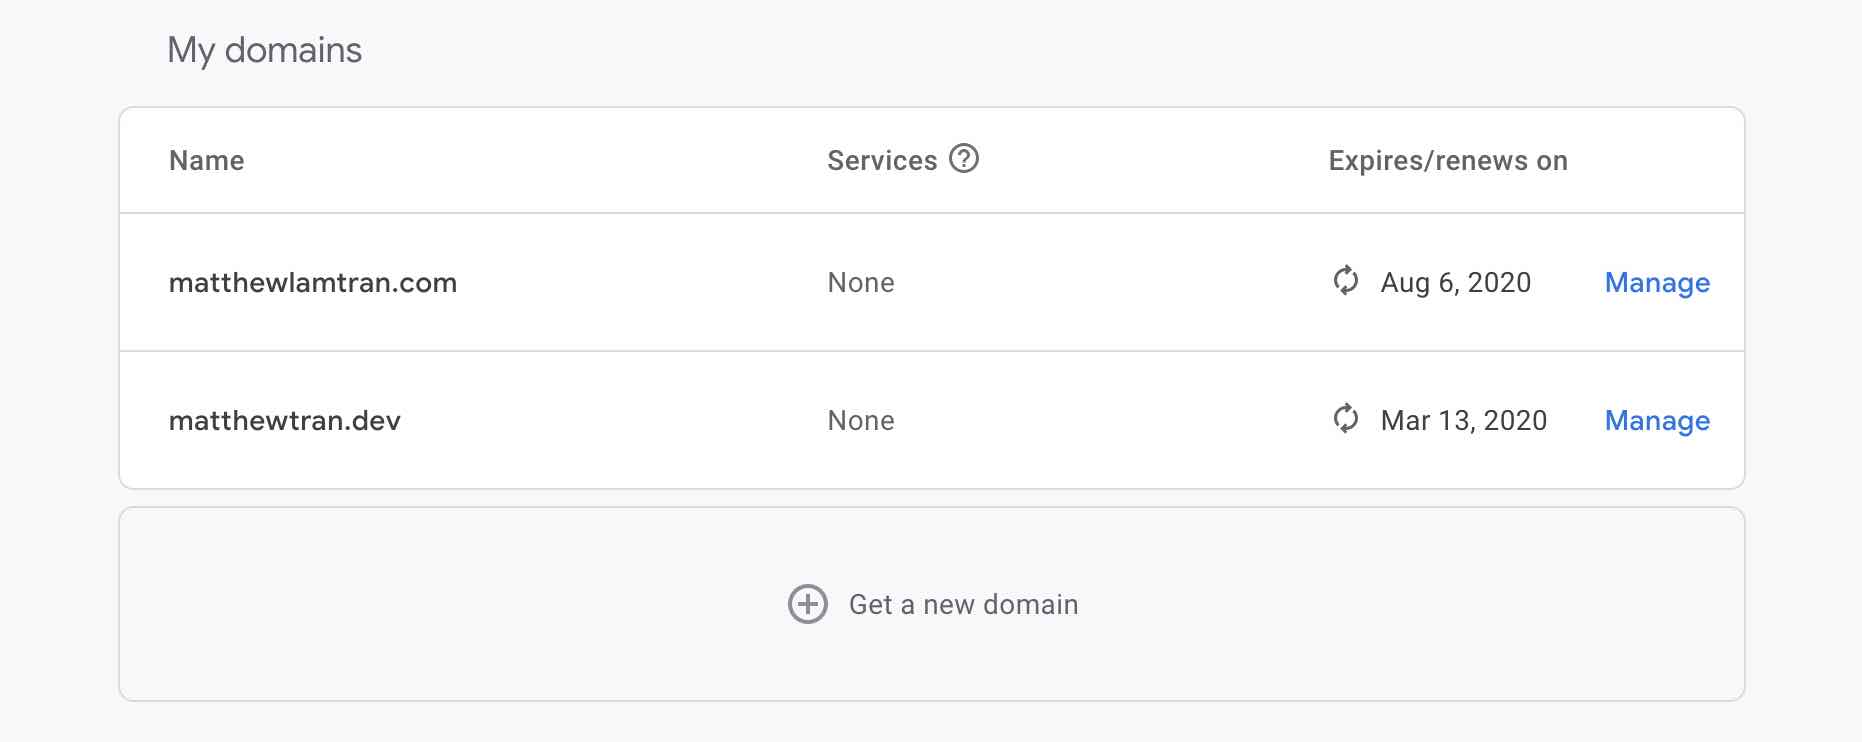
There’s really no shortage of different domain registrars out there to buy a domain from, but in the end I decided to use Google Domains because it has the cleanest user experience, very competitive pricing, and doesn’t try to sell you anything more than just a domain. For someone who is just starting out making a website and doesn’t need any extra functionality, it’s an excellent choice. As of the time of writing, I own both matthewlamtran.com and matthewtran.dev and it only costs $12 a year for each domain. I’m sure there are better choices out there, but this is the one I’m sticking with. Also, make sure you turn on auto-pay or remember to pay the annual fee because your domain can go up for sale again, where it will likely get picked up by someone else.
If you don’t want to buy a domain yet, there are free DNS services out there, like dynu.com, where you can get a free domain that looks something like <your name>.<free dns provider>.com. I don’t use it anymore, but to each their own.
Self-Hosting vs. Using a Hosting Service
When I first bought matthewlamtran.com over a year ago, I had to choose between hosting a website myself or using one of a seemingly limitless number of hosting services. Since I was just getting started with making my own website and didn’t expect very much traffic, if any at all, I decided to host my website on a Raspberry Pi at home. Some of the benefits of hosting at home are total control over your own server, lower costs, and a greater understanding of the internal workings of a web server. However, it also makes you responsible for the security and maintenance and there’s no customer support to call if something goes wrong.
However, as my website grows, I will likely switch over to a hosting service because I will become limited by the internet speeds available at my home (I’m looking at you Charter Spectrum with those low upload speeds) and also by the scalability of my server. Electricity costs also become a concern as server load increases. For now and for the foreseeable future though, I’m sticking to running my own server. If you want to use a hosting service, you should still continue reading because you can still learn a thing or two from my experience.
Redirecting a Domain Name to Your Own IP Address
Underneath the pretty website names you type into your browser is the Domain Name Service (DNS). It matches every domain name to an IP address, which in turn locates the web server in cyberspace. There’s also two different address types: IPv4 and IPv6. IPv6 is needed because, in our growing digital age, we will eventually run out of IPv4 addresses. For now, I’ll just cover IPv4, but the instructions should be applicable to IPv6 if necessary.
First, go to a website like whatismyip.com while on a device using the same internet that your server will be on. Record the IP address.
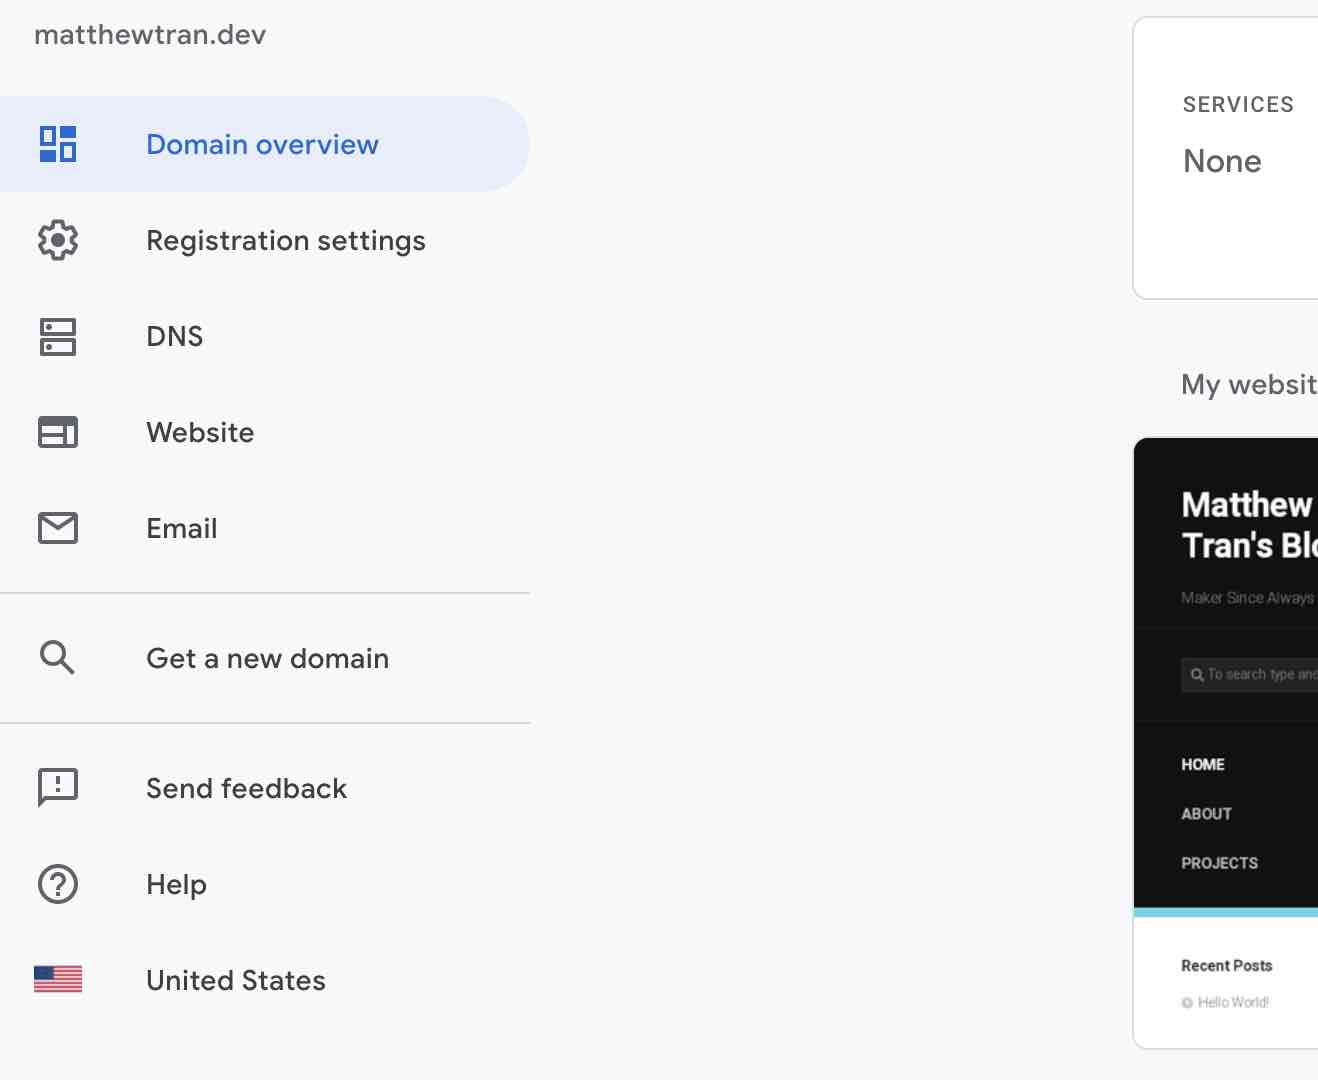
Now login to the domain registrar where you bought your domain, or the free DNS service if you’re using that. I’m using Google Domains, but these instructions should be applicable to other registrars.
Click on “Manage”.
Click on “DNS”.
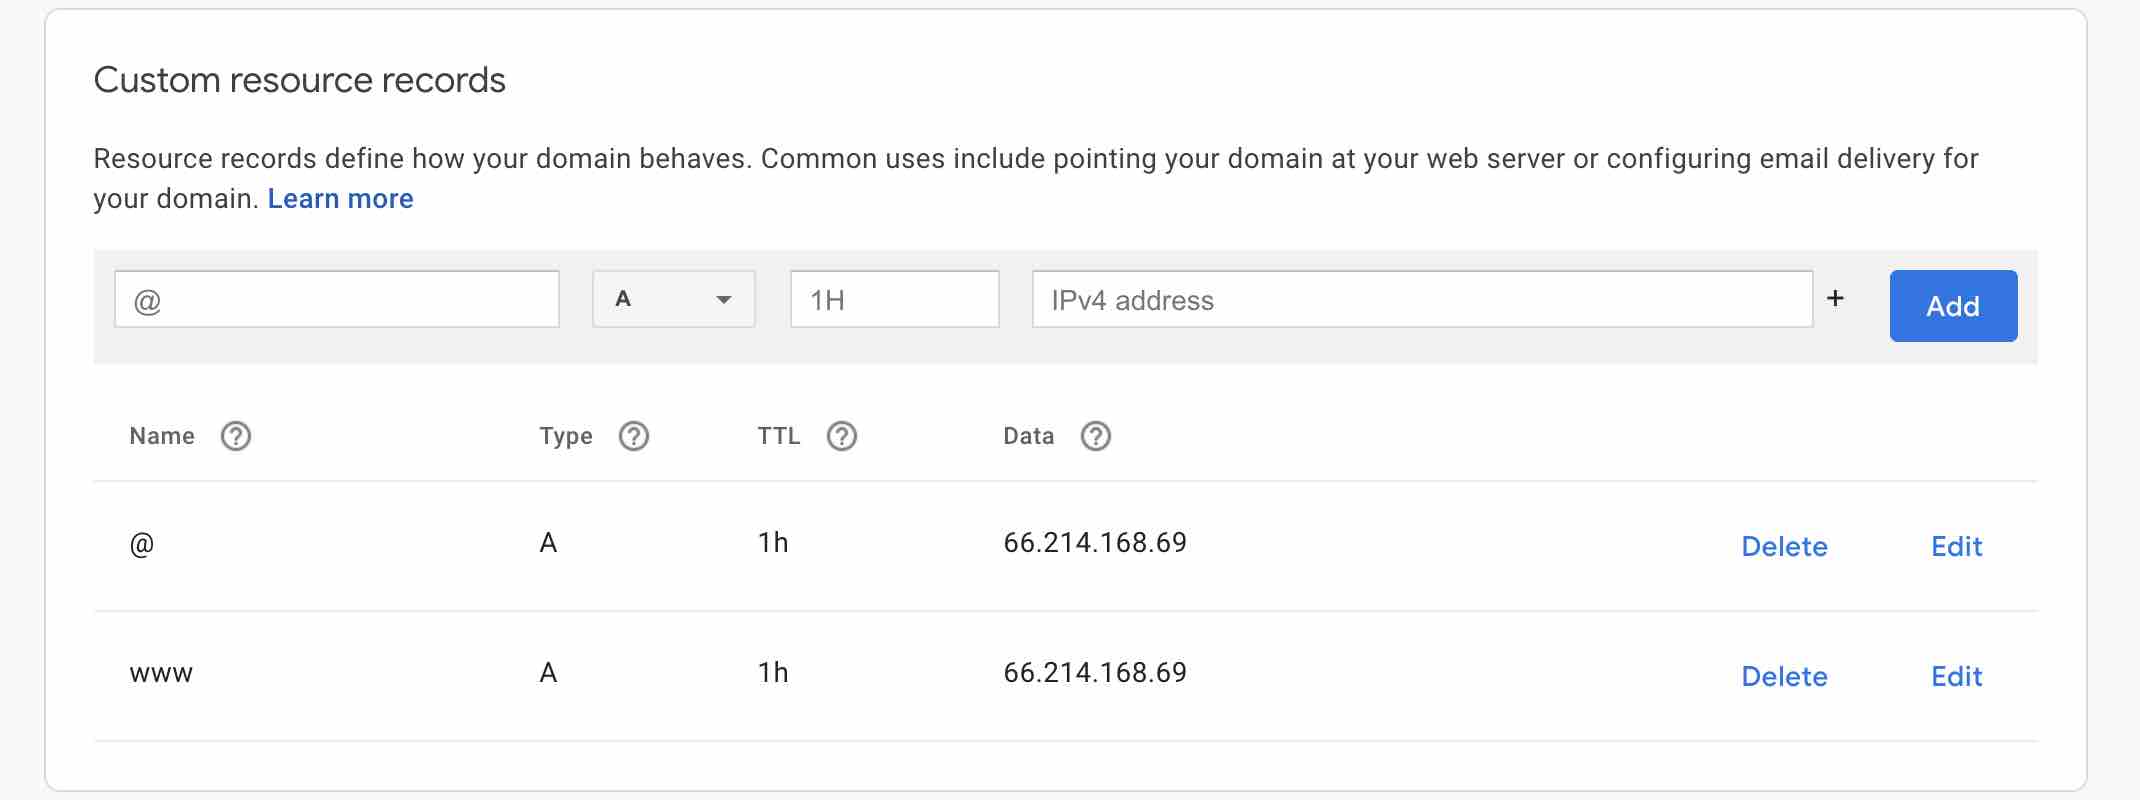
Finally scroll all the way down and add two entries to “Custom resource records.” Replace the IP address with your own recorded IP address.
DNS records take some time to update, around 20 minutes for Google Domains. To check if the DNS is updated, try the following command in your terminal (“-n” instead of “-c” for Windows):
ping -c 5 <domain name>If it all works out, you should see your IP address from earlier!
If your Internet Service Provider (ISP) doesn’t have a static IP option, which is pretty much most residential internet plans, then this IP address will change every once in a while, in which case you’ll need to repeat the redirect process again. Pretty much the only ISP available in my area is Charter Spectrum, whose business and static IP options are unreasonably expensive for now, so I’m sticking to manually updating the DNS records for now. Luckily, my IP address pretty much only changes once a year, so I’m good. If you want to look into it, there’s dynamic DNS services out there that will do the updates and stuff for you. Now onto the actual web server setup part!
What You’ll Need
- computer that you can leave on 24/7 (I recommend a Raspberry Pi if you’re just starting out)
- microSD card or USB flash drive for installing the OS
- an ethernet cable (I don’t recommend using WiFi because of reliability and speed)
Installing the OS
Linux powers a surprisingly large part of the internet. Generally speaking, it’s faster, more secure, and ultimately easier to use. Even more, most distros are completely free and open-source. It was a pretty easy choice going with Linux, but since I am admittedly still pretty new to the world of Linux distros, I picked the most familiar distro, Ubuntu Server. They also have a version for the Raspberry Pi, so if you ever want to upgrade your server to a full size PC or something, it should be a relatively simple transition.
The process of installing an OS on the Raspberry Pi has been done to death, but it basically involves downloading the OS from the website, flashing it to a microSD card using something like Etcher, and then finally plugging it into the Pi.
Installing Ubuntu Server onto a normal PC is pretty similar, but instead flashing to a flash drive, plugging into the computer, and going through the setup process.
Initial Setup
Now plug in your server and connect the ethernet cable from your server to your router. It’s possible to then figure out the IP using nmap (sudo nmap -sP 192.168.0.1/24 on MacOS) to SSH into it, but out of convenience I just hooked up a monitor and keyboard to my server and logged in with the default username and password (both “ubuntu”).
I cannot stress enough the importance of having a strong password for everything, especially when setting up a web server. To change your password, run the following:
passwdNow we need to update everything so run:
sudo apt update && sudo apt upgradeupdate updates the list of packages and their versions while upgrade does the actual upgrading of the packages to their latest versions. Ubuntu Server does this update process automatically, but it doesn’t hurt to check every once in awhile.
SSH should be enabled by default, but just in case, run:
sudo apt install openssh-serverI usually install a text editor at this point, which in my case is vim. You can use nano, but I think it’s worth it to learn vim.
sudo apt install vimFor future reference, I tend to run a lot of commands from the home directory. I will assume you have basic knowledge of vim. All you really need to know is press esc then type wq to save and quit and also press i to enter typing mode. I’ll also assume you know how to use cd to change directories and all that. The basics of getting around a terminal really.
Setting Up a Static IP
Just like how your external IP address changes, every device on your local network’s internal IP address can change too. First, we’ll setup a static IP on your server. Run the following:
cd /etc/netplan
ls
There should be a .yaml file in the directory. We’re going to edit it.
vim <file name>.yamlChange it from something that looks like this:
network:
    version: 2
    ethernets:
        eth0:
            dhcp4: false
To something like this:
network:
    version: 2
    ethernets:
        eth0:
            dhcp4: false
            addresses: [192.168.0.***/24]
            gateway4: 192.168.0.1
            nameservers:
                addresses: [8.8.8.8,8.8.4.4]
Keep in mind that what you put under “addresses” and “gateway4” can change slightly depending on your network, but running “ifconfig” can help you figure out what the right values are. The last 3 digits of the address in “addresses” (the ***), can be pretty much whatever you want up to 255. For more details check here. Now run:
sudo netplan applyNow we need to head over to your router’s admin page, usually located at something like 192.168.0.1. Every router is a little different but the gist is that we’re going to assign the MAC address of our server’s ethernet to the specific IP address we listed under “addresses,” without the /24.
At this point I like to run a good old sudo reboot, disconnect the monitor and keyboard, and head over to my laptop to complete the rest of the setup process. Congrats, your server is headless! To login to your server you can SSH into it (you might need to install a SSH client like Putty if you’re on Windows).
ssh ubuntu@<ip address>Installing the LEMP Stack
The LEMP stack consists of Linux, Nginx, MySQL, and PHP. It’s the backbone of pretty much any web server. You’ll hear a lot about LAMP, which is similar, but uses Apache instead of Nginx. For it’s speed and recency, I’ve found Nginx to be a better choice for my use case and this tutorial will reflect that. One thing to keep in mind about Nginx is that most tutorials out there assume you use Apache, so just add Nginx to your search query and you’ll be good.
Installing Nginx
sudo apt install nginxNow we need to allow Nginx through the firewall.
sudo ufw allow 'Nginx Full'
sudo ufw enable #this might warn about disrupting ssh, but it's fine
sudo ufw status
You’ll probably want Nginx to start up whenever your server restarts.
sudo systemctl enable nginx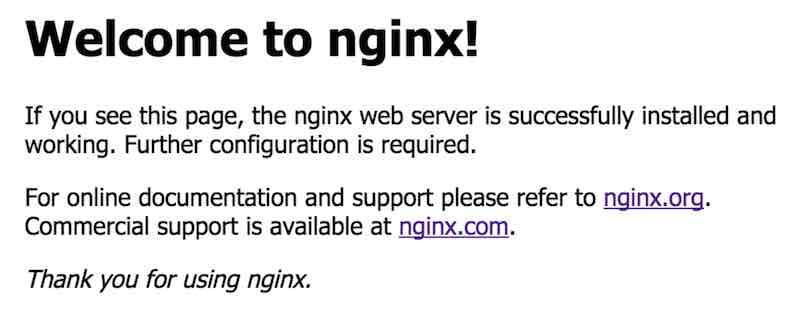
Now’s a good time to test your Nginx installation. Head over to a web browser and type in your server’s IP address (the one you use for SSH). If you see something like the right image, you’re good!
Now’s also a good time to port forward web requests from the outside world to your server. If you’ve ever setup a Minecraft server, then this should be easy. If not, Googling your router’s model plus “port forward” should lead you in the right direction. You’ll want to forward requests from port 80 (HTTP) and port 443 (HTTPS) to your server’s internal IP address. When that’s done try typing in your domain name to your browser and you should see the same page as before!
Setting Up Server Blocks
Currently Nginx is routing every request to the default server block, whose files are stored in /var/www/html. However it’s good practice to setup a server block for each website you’re hosting (even if it’s only one). For example, the files for my server are stored in /var/www/matthewtran.dev/html. What’s super cool is that this allows you to host multiple websites on the same server (although you might not want to for security reasons, but it depends). To make things easier to read I’m going to use matthewtran.dev as the domain for my examples, but be sure to change matthewtran.dev to whatever your domain is when you do this.
First, Nginx uses the user “www-data” when interacting with the files on your website. In order to avoid file permission errors later with WordPress, we’ll add “ubuntu” to the same user group as “www-data”.
sudo usermod -a -G www-data ubuntuNow let’s make the appropriate directories and assign proper permissions.
sudo mkdir -p /var/www/matthewtran.dev/html
sudo chown -R $USER:www-data /var/www/matthewtran.dev/html
I generally like to remove the default html folder at this point.
sudo rm -r /var/www/htmlFor testing let’s create a file named index.html inside this new html folder. You can pretty much put any old html code. Here’s literally what I put:
Welcome to matthewtran.dev!Now we need to tell Nginx about this new server block we made.
cd /etc/nginx/sites-availableAdd the following to a new file named “matthewtran.dev”
server {
    listen 80;
    listen [::]:80;

    root /var/www/matthewtran.dev/html;
    index index.php index.html index.htm;

    server_name matthewtran.dev www.matthewtran.dev;

    location / {
        try_files $uri $uri/ /index.php?q=$uri&$args;
    }
}
Now we link this new config file to the sites-enabled folder.
sudo ln -s /etc/nginx/sites-available/matthewtran.dev /etc/nginx/sites-enabled/I also like to unlink the default enabled site at this point.
sudo rm /etc/nginx/sites-enabled/defaultIf you’re going to add more sites, it’s also a good idea to uncomment this line in /etc/nginx/nginx.conf.
server_names_hash_bucket_size 64; #uncomment this oneFinally, we need to check our config files and restart (reload works too) Nginx to apply these updates.
sudo nginx -t
sudo systemctl restart nginx
Enabling HTTPS!
Enabling HTTPS on your website is an incredibly important step. Luckily, it’s pretty easy to do (and free).
sudo apt install python-certbot-nginx
sudo certbot --nginx -d matthewtran.dev -d www.matthewtran.dev
Again, make sure to change matthewtran.dev to your domain name. You’ll need to enter your email, which Let’s Encrypt uses to tell you if your certificates are about to expire, in which case you’ll need to use a good old sudo certbot renew. We can also make that happen automatically.
sudo crontab -eAdd this line to the bottom.
0 12 * * * /usr/bin/certbot renew --quietNow head over to your web browser and head to your domain. You should see that it’s now secured using HTTPS!
Installing MySQL
sudo apt install mysql-server
sudo mysql_secure_installation
You’ll be asked to set a new set a password for a root user. There’s a bunch of questions after that I just said yes to because it’ll increase security. Now we need to allow logging in to the root user using a password.
sudo mysqlmysql> ALTER USER 'root'@'localhost' IDENTIFIED WITH mysql_native_password BY '<your password>';
mysql> FLUSH PRIVILEGES;
mysql> exitNow if you try sudo mysql, it should deny you, but try mysql -u root -p and you should be able to login.
Aside: After all this setup, I’ve realized that I didn’t actually need to enable logging into root and disabling logging into root from phpMyAdmin later. Using SQL commands, I can grant the appropriate permissions for the user that has access to my WordPress database as well as not giving all the permissions to the phpMyAdmin user. This way, even if someone hacks into my phpMyAdmin, they can’t login into any account that has a dangerous level of permissions. You know, I’ll go do that right now.
Installing PHP
sudo apt install php-fpm php-mysqlNow we need to tell Nginx to use PHP, so head over to your website config file in /etc/nginx/sites-available. Update it to look something like this (you’ll notice a bunch of extra lines that relate to HTTPS but don’t worry about those):
server {
    listen 80;
    listen [::]:80;

    root /var/www/matthewtran.dev/html;
    index index.php index.html index.htm;

    server_name matthewtran.dev www.matthewtran.dev;

    location / {
        try_files $uri $uri/ /index.php?q=$uri&$args;
    }

    location ~ \.php$ {
        include snippets/fastcgi-php.conf;
        fastcgi_pass unix:/var/run/php/php7.2-fpm.sock;
    }

    location ~ /\.ht {
        deny all;
    }
}
Like before, restart nginx using sudo nginx -t and sudo systemctl restart nginx.
Now head over to your website’s html folder (the one with index.html in it) and make a new file called info.php and write this in it:
<?php
phpinfo();
Now if you go to <your domain name>/info.php, you should see a page that looks like this:
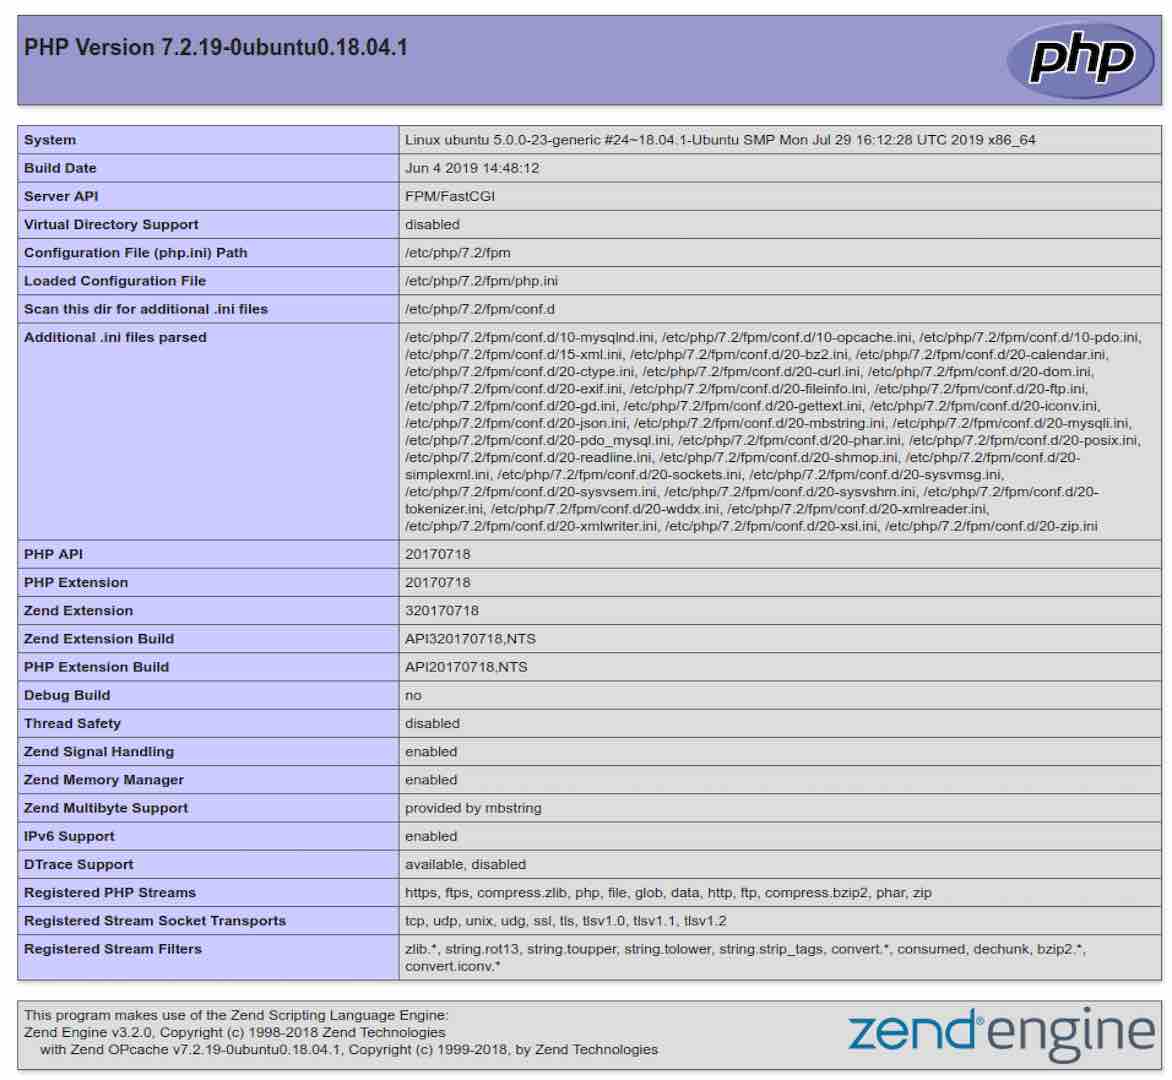
If everything’s working, it’s a good idea to remove info.php because it tells a would be hacker a lot about your website, which could be used to exploit security vulnerabilities.
Congrats! You’ve installed a full LEMP stack!
Installing phpMyAdmin
sudo apt install phpmyadminThe installation will tell you to choose between Apache and something else, but just press tab then enter to skip that. You also need to make a password for an account with username “phpmyadmin”. Use default settings for any other questions.
sudo ln -s /usr/share/phpmyadmin /var/www/matthewtran.dev/html/<str>A lot of bots and hackers like to scan websites to see if phpMyAdmin is installed, after which they may perform a brute force attack on the login. Let’s make it harder for them by putting something random in place of <str>. Some people (i.e. younger me) tend to just put “phpMyAdmin”. Don’t do that.
Now head over to matthewtran.dev/<str>, again replacing matthewtran.dev with your domain name, and you should see the phpMyAdmin login page like below:
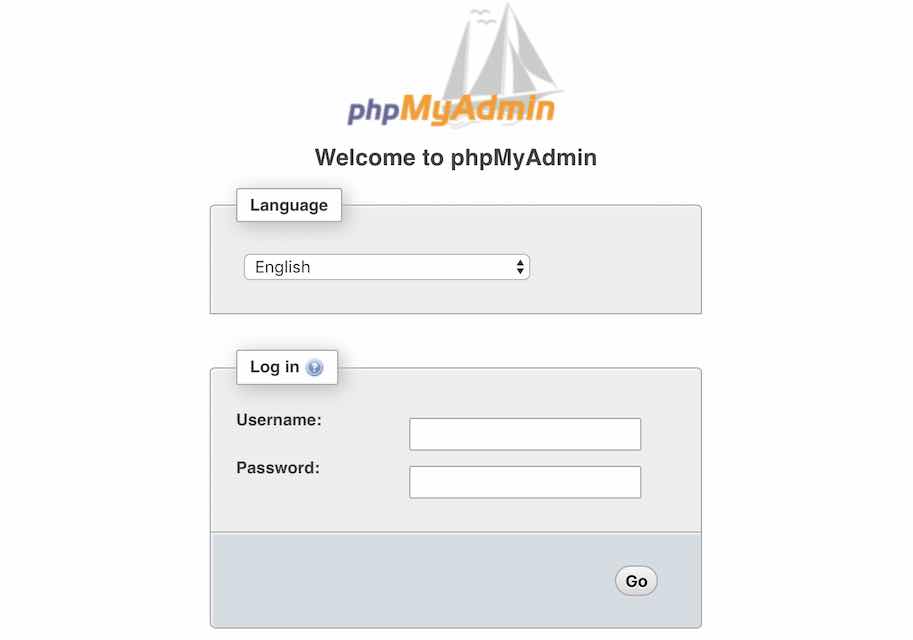
Try logging into the users root or phpmyadmin with the passwords you set to see if everything’s working.
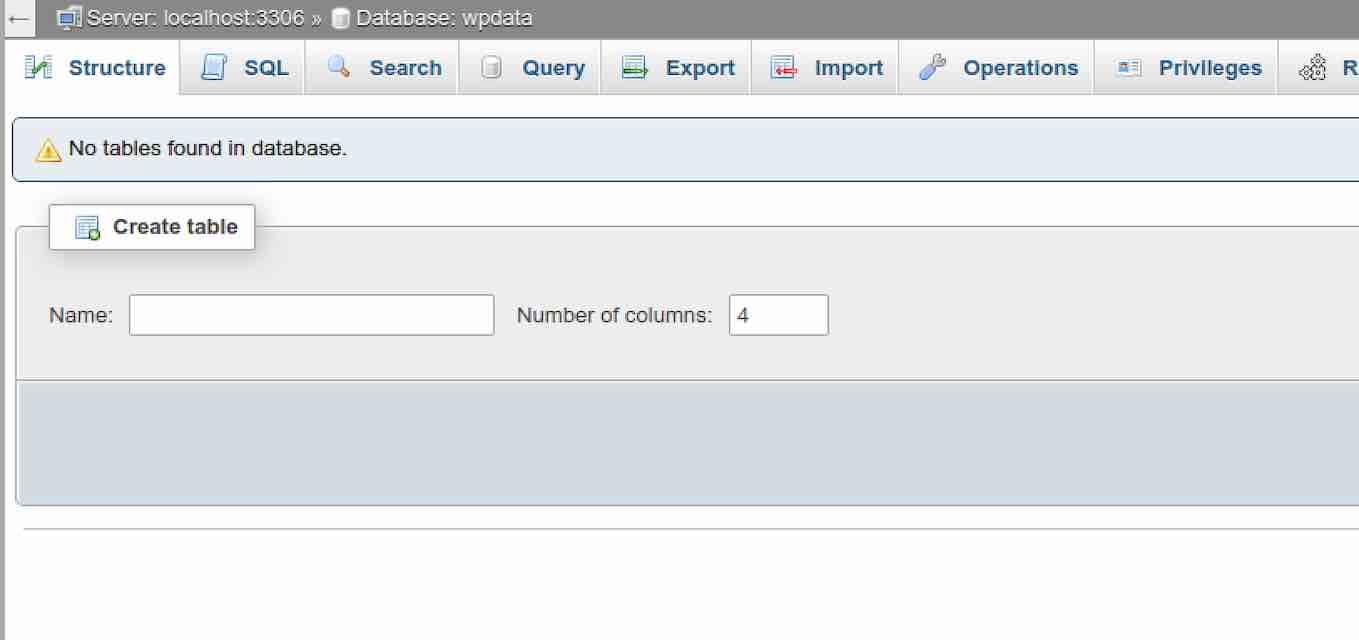
Now log into the root account (or the phpmyadmin account if you grant proper permissions to it through MySQL or the root account in phpMyAdmin) because we need to create a database for WordPress.
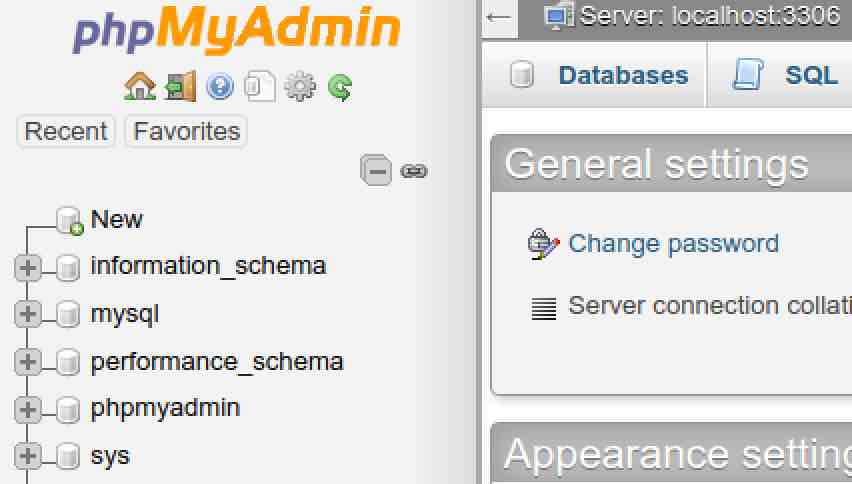
Click on “New”.
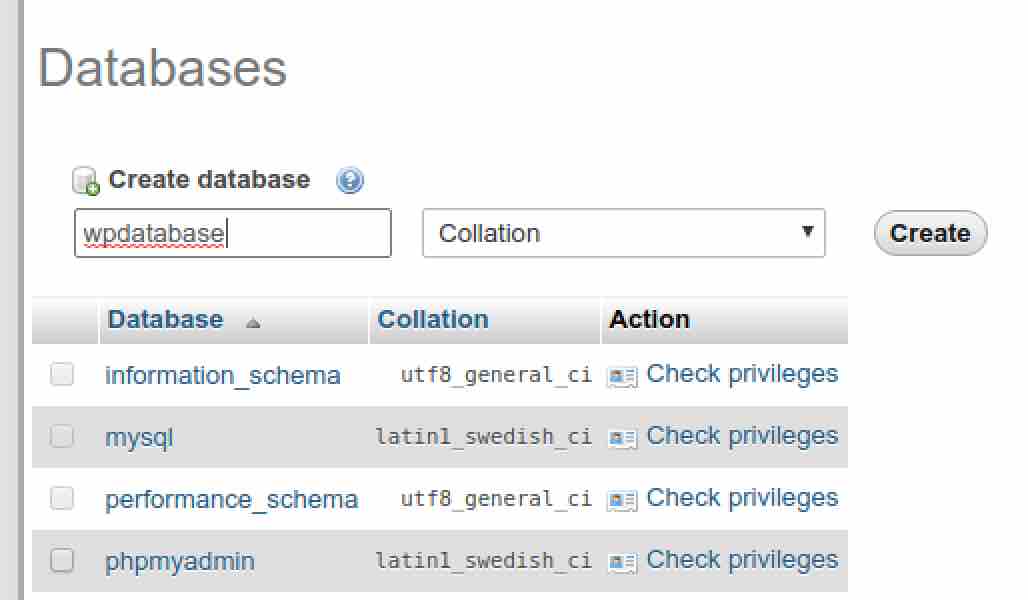
Enter a name for your WordPress database, like “wpdata”, and press “Create”.
Click on “Privileges”.
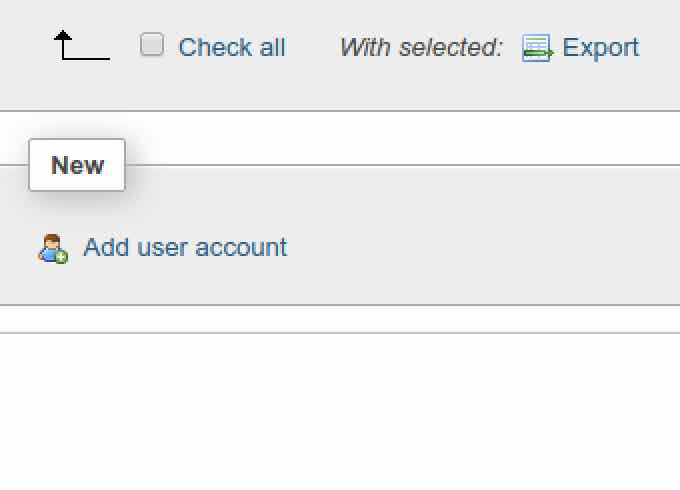
Click on “Add user account”.
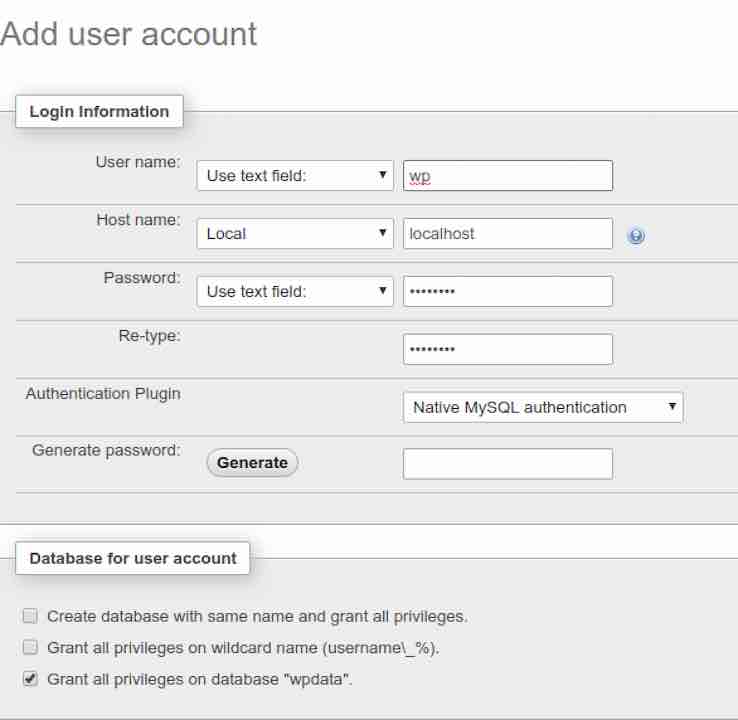
Finally, enter a username for your WordPress database user account, pick localhost under “Host name:” and enter a strong password. You will provide these account details to your WordPress installation later.
Disabling Root Login
Let’s secure phpMyAdmin further by disabling the root login.
sudo vim /etc/phpmyadmin/conf.d/pma_secure.phpAdd this to it, taking care to make any random 32 character string in place of <random string>.
<?php
$cfg['blowfish_secret'] = '<random string>';
$i=0;
$i++;
$cfg['Servers'][$i]['auth_type'] = 'cookie';
$cfg['Servers'][$i]['AllowNoPassword'] = false;
$cfg['Servers'][$i]['AllowRoot'] = false;
?>
HTTP Basic Authentication
To prevent brute force attacks in the case of someone finding your phpMyAdmin login page, let’s add another layer of authentication before anyone even gets to that page. First you need to come up with another secure password, different from all the other ones you’ve used of course, and run it through the following when it asks:
openssl passwd -apr1 > pma_passwdThe OpenSSL utility outputs a really long hash of your password, which we’ll send to the file pma_passwd for ease of use. Now edit that file and make it look something like this:
<username>:<hash>Replace <username>; with one of your choosing. <hash> is the hash that was already there when you opened the file. Now let’s move this to the nginx folder.
sudo mv pma_passwd /etc/nginxRemember that config file from earlier in /etc/nginx/sites-available? Let’s edit it and add a couple lines so it looks like this:
server {
    # other code
    # replace <str> with your <str> from earlier
    location /<str> {
        auth_basic "phpMyAdmin Login";
        auth_basic_user_file /etc/nginx/pma_passwd;
    }
    # other code
}
Now restart Nginx again (sudo nginx -t and sudo systemctl restart nginx) and try to access your phpMyAdmin screen again and you’ll see something like this:
Enter the username and password you used and you should be in. Congrats, your phpMyAdmin is now pretty secure!
This should deter bots since, as far as my logs from my WordPress login page show, they tend to get the 401 error and then leave. And yes, we will be securing the WordPress login page later too.
Installing WordPress
With everything in place, we finally get to the setup of WordPress itself. We start by downloading and unzipping the source files for WordPress.
wget -O latest.zip https://wordpress.org/latest.zip
unzip latest.zip
The resulting wordpress folder contains all the WordPress files which we will now move into the html folder of your website. Delete everything in that folder and then move the WordPress files over.
sudo rm -r /var/www/matthewtran.dev/html
sudo mv wordpress/* /var/www/matthewtran.dev/html
Now head over to your website and you should see the WordPress installation screen. It’s a pretty straightforward process. Just follow through all the instructions, taking care to give it the username and password for the account for the WordPress database from earlier. Also you’re going to create an administrator account for your website so make sure to pick a username that isn’t “admin” and a very strong password as always.
Congratulations! You’ve done the basic setup of your WordPress server. Now onto fixing some of the little issues that might pop up and some recommendations.
Fixing File Permissions
First, let’s change the group of every file to www-data.
sudo chown -R $USER:www-data /var/www/matthewtran.dev/htmlTo prevent an error about asking for FTP credentials, we need to modify wp-config.php. Go ahead and open it in Vim and at the very bottom of the file add the following.
define('FS_METHOD','direct');Chances are you won’t be able post or change your themes or anything because of permission errors. Let’s fix those.
cd /var/www/matthewtran.dev/html
sudo find ./ -type f -exec chmod 664 {} +
sudo find ./ -type d -exec chmod 775 {} +
sudo chmod 660 wp-config.php
This sets the proper permissions so WordPress is able to modify everything and update itself. Notice that we did chmod 660 on wp-config.php. That file actually stores the credentials for your WordPress database in plaintext, so it’s imperative that no one except WordPress can access it. We’ll be adding a bit more security to it soon.
Securing Important Files
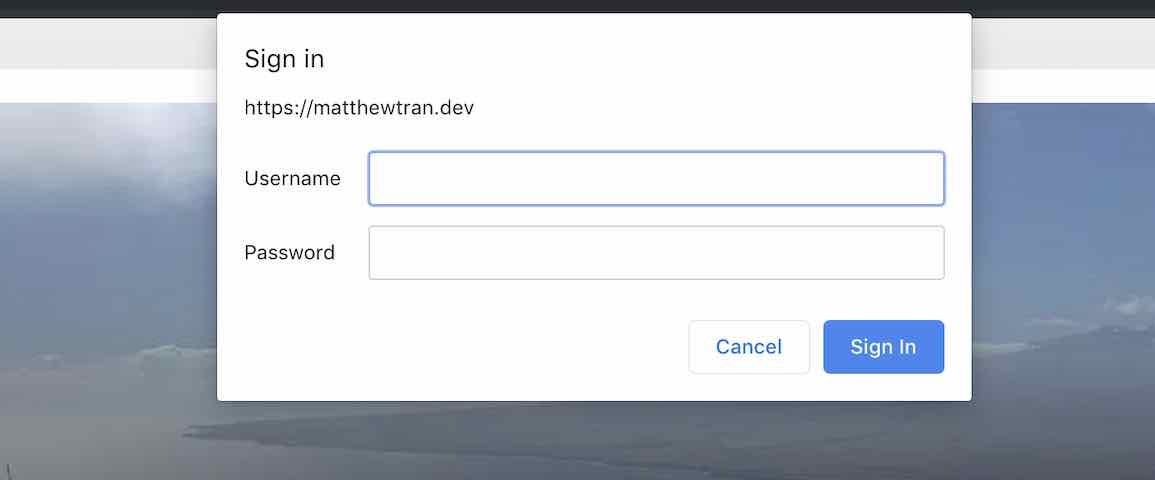
You may have noticed that anyone can get into your login page simply by typing <domain>/wp-login.php or <domain>/wp-admin (wp-admin actually redirects to wp-login.php). There are plugins like Jetpack and WordFence (which I highly recommend installing) that help secure your site against brute force attacks but let’s add another layer of security. The instructions for this are pretty much the same as when we secured phpMyAdmin.
openssl passwd -apr1 > wp_passwdLike before, edit wp_passwd with a username.
sudo mv wp_passwd /etc/nginxNow let’s enable authentication in the config file in /etc/nginx/sites-available. We’ll also deny access to wp-config.php outright so no one can access it.
server {
    # other code
    location /wp-config.php {
        deny all;
    }

    location /wp-login.php {
        auth_basic "WordPress Login";
        auth_basic_user_file /etc/nginx/wp_passwd;

        include snippets/fastcgi-php.conf;
        fastcgi_pass unix:/var/run/php/php7.2-fpm.sock;
    }
    # other code
}
Now let’s restart Nginx and test it out. If you try <domain>/wp-config.php you should get a 403 error. If you try <domain>/wp-login.php you should see a place to enter a username and password just like with phpMyAdmin. Perfect!
Check Site Health
Now login into your WordPress installation and go to the Site Health page under Tools. There you can see if there’s anything else that might be wrong. This tutorial pretty much covers all the problems I’ve seen while doing this whole setup on Ubuntu Server, so you should be fine. You might be missing some PHP packages like Imagick, which you should be able to install with a simple sudo apt install php-<pkg name>. Google is your friend here. Sometimes a good sudo reboot is necessary to fix any latent problems.
Recommended Plugins
One thing to keep in mind with plugins is that you should make sure they’re always updated because of potential security vulnerabilities. Just like how you wouldn’t install a shady or very outdated app on your computer, you shouldn’t install one on WordPress. Even themes can have vulnerabilities. That being said, here’s some plugins I recommend:
- Jetpack
- Wordfence
- Akismet Anti-Spam
- MonsterInsights
- WP Super Cache
- Yoast SEO
SEO Optimization and Analytics
Something you might hear about a lot online is SEO optimization. This is so that search engines like Google will rank your website higher, making it more likely for people to find, and ultimately giving your website more reach. There are many things to consider, but I think the Yoast SEO plugin is a pretty good starting point for learning about the various aspects of optimizing your website.
You might also want to keep track of how your website is doing in terms of visitors. The Jetpack plugin, which also provides a level of security, has some basic analytics of your website. I used Google Analytics before on my other website and was delighted to find out about the MonsterInsights plugin which links to your Google Analytics account and gives pretty good information about your website.
I also use the Google Search Console to also keep track of how my websites are showing up in searches (current count: 0).
Speed Optimization
Now you may realize that when opening your website that it’s quite slow. The reason for this is that WordPress regenerates your website for every visitor. The plugin WP Super Cache fixes this problem by generating your website and storing it in a cache which then gets served to visitors. This vastly sped up my website, but I do have to press “Delete Cache” every once in awhile when my website isn’t updating properly. One big thing to keep in mind is that images are huge, so make sure to shrink them down and compress them (like by converting to JPEG). I like to keep all my pictures under 50kB if I can. For privacy reasons, make sure you remove all the meta data from pictures before uploading. I use ImageOptim when I’m using my MacBook, but I’m pretty sure a Windows equivalent exists.
Sometimes the bottleneck for speed on your website comes from the server itself. You can use tools like htop and iotop to analyze your system under load and see where the slowdowns are. Currently, my storage system is the slowest part, which is to be expected. I’m going to definitely upgrade my server during the next big sale.
Security
There are so many more ways to improve the security of your website, not all of which I’ve even implemented. What I’ve provided so far is a pretty good start at a secure site. There’s more to do but after this point it’s more of the little things, dealing with more permissions and what not. If you want to learn even more about securing your site, I’d recommend checking out some of the links below.
- https://www.wpbeginner.com/wordpress-security/
- https://bjornjohansen.no/block-access-to-php-files-with-nginx
- https://lamosty.com/2015/04/14/securing-your-wordpress-site-running-on-nginx/
One thing to keep in mind is that if you’re using Jetpack or the WordPress app, you need to allow access to xmlrpc.php. It’s technically a vulnerability, but Jetpack and Wordfence protect you from it.
Backing Up Your Server
There’s many backup plugins out there, but it’s good to know how to backup your WordPress installation manually just in case. Basically just copy your entire html file to a safe place. Then login to phpMyAdmin using the account you made for WordPress, click on the database, then export and download the .sql file. Don’t worry about all the errors that show up, just click ignore all.
Restoring is also relatively simple, just copy over the html folder and then head to phpMyAdmin, login, make a new database, and import the .sql file.
Conclusion
Congratulations! You’ve just set up your very own WordPress server from scratch. It’s quite the journey but it’s rewarding in the end. Now go off and install themes, make posts, or really anything. WordPress is quite an impressive platform and you can do so much on it. Good luck!
Sources (Check these out for more details!)
- https://linuxconfig.org/how-to-configure-static-ip-address-on-ubuntu-18-04-bionic-beaver-linux
- https://www.digitalocean.com/community/tutorials/how-to-install-linux-nginx-mysql-php-lemp-stack-ubuntu-18-04
- https://www.digitalocean.com/community/tutorials/how-to-install-nginx-on-ubuntu-18-04
- https://www.digitalocean.com/community/questions/wordpress-and-nginx-404-errors-all-but-home-page
- https://www.nginx.com/blog/using-free-ssltls-certificates-from-lets-encrypt-with-nginx/
- https://www.digitalocean.com/community/tutorials/how-to-install-and-secure-phpmyadmin-with-nginx-on-an-ubuntu-18-04-server
- https://www.freshwpthemes.com/tutorial/how-to-create-a-database-for-wordpress/
- https://www.smashingmagazine.com/2014/05/proper-wordpress-filesystem-permissions-ownerships/
Comments